

The first coffee bar I put together lasted about nine days. It was photographed beautifully. It also sat at the far end of the counter, three steps past the trash can and nowhere near an outlet, so within two weeks the coffee maker had migrated back beside the sink, and my nice little tray was holding junk mail.
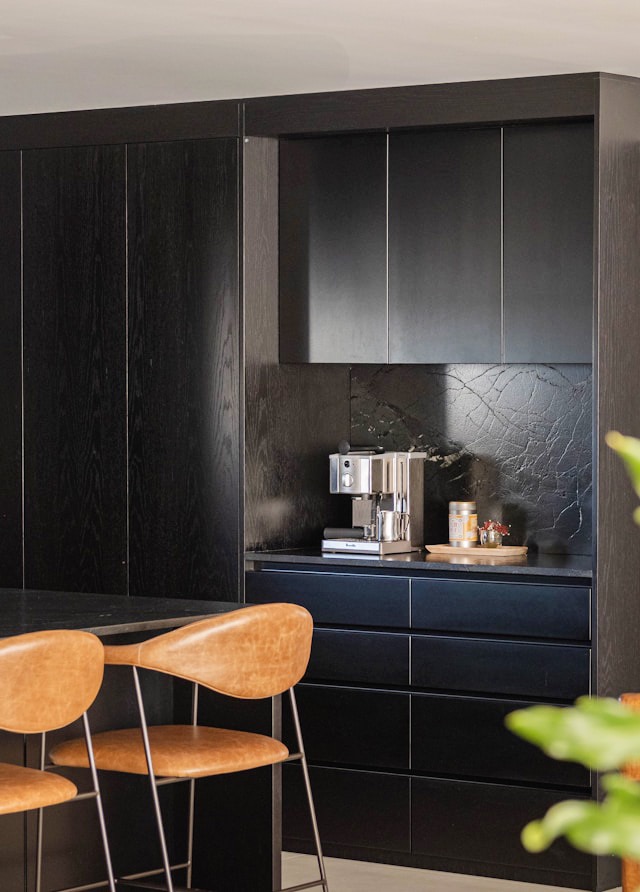
A home coffee bar works when it fits the way your kitchen already moves at 6 a.m. Measuring your morning is less fun than shopping for canisters. That's how I built mine backward the first time: pick the look, then wonder why nobody walks over to it. The steps below run in the order that matters, starting with the least glamorous one.
Step 1: Pick the Right Spot for Your Coffee Station
Power comes first. Kitchen countertop outlets are supposed to be on 20-amp circuits, and the National Electrical Code requires at least two, which leaves about 1,900 watts of available capacity on each. Older kitchens often still run on 15-amp wiring, which drops that closer to 1,440.
A coffee maker draws 600 to 1,500 watts, depending on the type, so adding a kettle or toaster to the same circuit is how people find their breaker box before the first cup. Check which outlets share a circuit before committing to a wall.
Then walk the route. A coffee station earns its keep within a couple of steps of the sink, since you'll rinse the carafe constantly, and out of the traffic path between the fridge and the stove. Counters run about 24 inches deep, and 30 inches of width is the floor for a machine, a grinder, and a mug.
A plain corner nobody fights over beats a prettier spot in the morning rush. A rolling cart, the counter beside the fridge, even a low bookshelf top will work if the outlet and walking distance check out.
Step 2: Gather the Home Coffee Bar Essentials You'll Actually Use
Strip the list back to what earns its footprint:
- A brewer you like using. Drip if you're pouring for more than two people. French press if your weekends are slow enough to stand and wait. Pods if speed wins in your house.
- A burr grinder. Blade grinders chop unevenly, which pulls bitter and sour notes out of the same batch. The one upgrade most home setups taste immediately.
- An airtight, opaque canister. Beans hate light, heat, moisture, and air. Keep them at room temperature in a cabinet away from the oven. Skip the fridge, where condensation and neighboring odors get in.
- Mugs you actually reach for. Six to eight, not the twenty hiding in the back cabinet.
- A spoon rest and a small towel. Coffee bars die of stickiness.
- Somewhere for the grounds. A compost tin or trash catch within arm's reach.
Water temperature does more work than the beans get credit for. The Specialty Coffee Association puts the ideal brewing range at 195 to 205°F, which is why a cool-running machine makes weak coffee no matter what you paid for the roast.
Syrups deserve a shelf only if you drink them. A row of unopened bottles is decoration pretending to be functional. You can make your own coffee syrup like my Brown Sugar Coffee Syrup.
Step 3: Go Vertical So the Counter Stays Clear
Counter space is the whole game. Every item you move up to the wall buys back room to work.
Mug hooks and a floating shelf for canisters do more for a small kitchen coffee bar than any organizer bin. The National Kitchen and Bath Association sets a standard clearance between the counter and upper cabinets at 18 inches, with a minimum of 15 inches.

Measure before you hang anything; you want room to lift a full carafe without scraping your knuckles. The wall above a coffee station doesn't all have to go to storage. Leaving one side for something with personality keeps the setup from reading like a supply shelf.
Custom neon signs do two jobs in that spot. They mark the corner as its own little zone, and they throw off enough soft light to make the counter usable before sunrise.
Step 4: Light the Coffee Bar Like a Real One
Kitchen overheads are positioned over the sink and stove, which casts the coffee corner into your own shadow. Two fixes solve this, and they stack.
Under-cabinet lighting handles the practical side. Warm strips around 2700K keep wood and ceramic looking warm rather than gray; push past 4000K and the corner turns blue and clinical.
The second layer changes how the space feels rather than how well you can see. A lit piece at eye level is what separates a coffee bar from a coffee appliance. Modern LED neon runs on a 12- or 24-volt adapter, so it stays cool to the touch and draws a fraction of what old glass tubing required at several thousand volts.
That matters above a counter where kids reach. Sizing trips people up more than color does: too small, and it floats; too large, and it crowds the shelf. These tips for choosing a neon sign for your wall cover: measure properly; the short version is four to six inches of breathing room on either side.
Step 5: Style Your Coffee Corner Without Crowding It
Restraint reads as intentional. Three or four objects on a tray look styled. Nine look like a yard sale. A tray under the machine catches drips and adds an edge to the arrangement. One small plant earns its spot (pothos survives kitchen humidity and neglect equally well), a jar of stirrers, two cookbooks, done.
Seasonal swaps keep the corner from going stale. A cinnamon stick jar in November, a pitcher of zinnias in July. For something that feels personal year-round, a piece of lettering does more work than another canister.
Scrolling through neon signs for home decor shows how a single line of text can reshape a blank wall: a family name, a favorite phrase, a coffee cup outline. Resist matching everything. A little mismatch is what keeps a home coffee bar from looking like a showroom display.
Step 6: Set Up a Restock Routine That Keeps It Running
Building the station is the easy part. Keeping it stocked is where most of them fall apart.
Pick one day and reset the corner: wipe the tray, refill the canister, descale the machine.
KitchenAid recommends descaling monthly if you brew daily, using half white vinegar and half water, then two or three plain-water cycles to rinse. Read your manual first. Several pod and espresso makers warn against using vinegar, and doing so can void the warranty.
Buy whole beans and grind as you go if you can. Ground coffee starts losing its aroma within hours; whole beans hold for two to four weeks in that canister. A chalkboard on the shelf catches "we're almost out" before it becomes "we're out." Put beans, filters, and creamer on the running list with milk and bread.
A coffee bar that runs dry on a Tuesday stops being a coffee bar by Thursday. Keep it stocked, and it stays exactly what you built it to be: the one corner of the kitchen everybody walks toward before anyone says a word.