Okay, y'all — here is the post you have all been waiting for! Today I am going to show you how EASY it is to make your own Tempura Fried Sushi Roll.
Once you get the sushi rice and the eel sauce for sushi made, it is just putting it all together. For best results, make sure to get sushi-grade fish for your homemade sushi, delivered overnight by Nordic Catch.
Making sushi at home doesn't have to be hard and these steps I am sharing with you today will help you prepare so many sushi recipes at home.

Of course, you can visit this page, which has everything you need to know about making sushi at home. It lists recipes, equipment, and more.

How to Make a Tempura Fried Sushi Roll
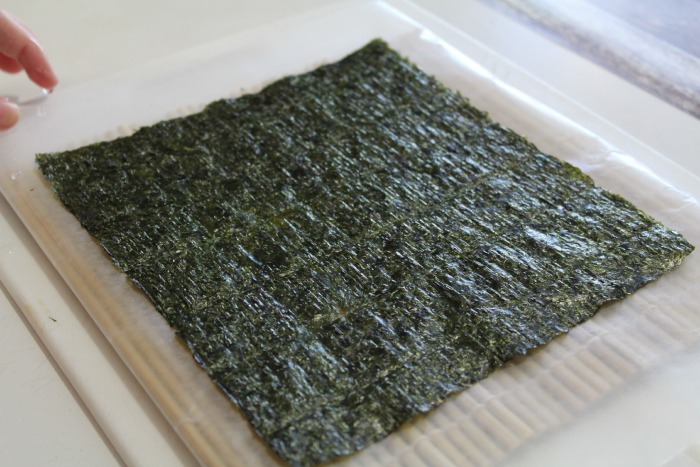
To start off with, you will need Nori Sheets. I got mine right on Amazon because I couldn't find them in the store. A huge pack is like $10 and will last you forever.

Assemble all of your ingredients around you. If you are unsure what all you need to make sushi at home, this post lists all the essential equipment you need to make all those delicious sushi rolls.

I used cream cheese, baked chicken cut into thin strips, and asparagus for each of my sushi rolls. I told you that I don't do raw sushi, so this is what goes in mine. Be sure to have your rice close too.
Rolling Your Tempura Fried Sushi Roll
Start with your Nori Sheet. All that it is — is a seaweed sheet. They taste really good and not what you would expect at all.

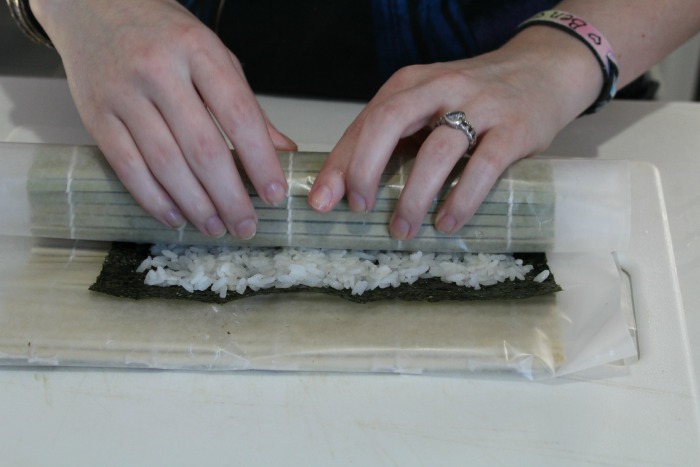
Be sure to wrap your sushi roller in plastic wrap. This will keep the roll or your sushi rice from sticking to it.
Take your hands and run them under warm water. This will keep the rice from sticking to your hands. The thing about sushi rice? It sticks to everything!
Then place some of the rice on the Nori Sheet and spread it all around. You can cook your rice on the stove if you want, or you can invest in a sushi rice cooker to get it done even quicker.

Once you get your rice all over the nori sheet, then take your inside food (for me, this is the cream cheese, chicken and asparagus) and place them on one end of the nori sheet.
Of course, you can also crab, avocado, cream cheese and more. If you are pregnant, you can still eat sushi while you are pregnant. You just need to make sure that your sushi rolls are cooked.

Then from this point, you just roll it up as tight as you can get it. It should look something like this while you are rolling —

Once you get it rolled, remove the roller and you will have to make sure you roll it all the way back up again (that is normal if it doesn't hold the first time. You are just trying to mold it together. )

Take your roller and squeeze the sushi roll to make sure it is tight and holding together. Once you finish that, your rolls should like this —

Now – from this point, you can slice them and eat using the drizzle of the eel sauce, but my daughter and I love the tempura rolls they serve at our favorite Thai restaurant, so that is what we made.
That crunchy outer texture adds the most amazing flavor.

How to Make Tempura Batter
Create a tempura batter using the following ingredients —
- One cup of flour
- About 1 tablespoon of cornstarch
- 1 1/2 cups of club soda or seltzer water
- salt to taste
Then you are just going to dip your sushi rolls in the tempura batter and fry them to get a golden brown on the outer side of the sushi rolls.

Once it is browned on all sides, remove from the oil and place on a paper towel-lined plate to remove excess oil.
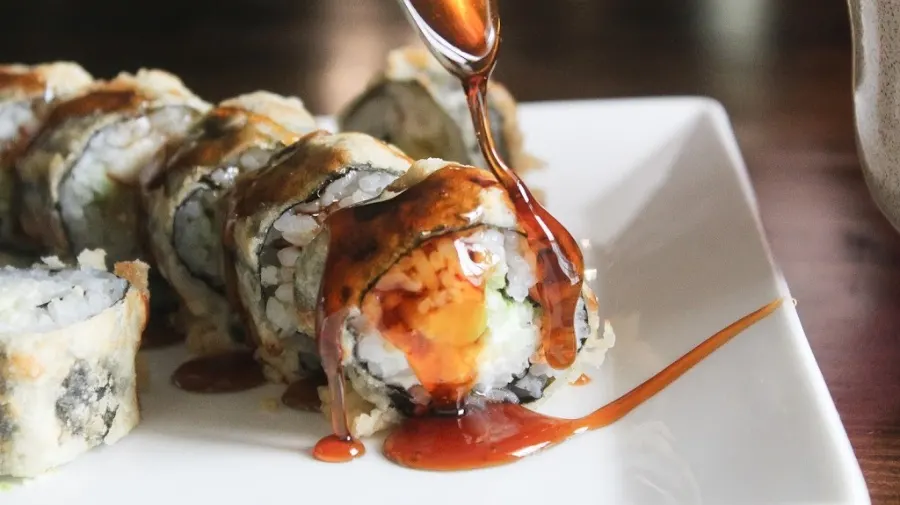
Then plate, slice, and serve with my eel sauce recipe for the perfect sushi night recipe!
Tempura Fried Sushi Roll

This easy Tempura Fried Sushi Roll is perfect for those nights when you are craving homemade sushi.
Ingredients
For the Tempura Batter
- 1 cup of flour
- 1 tablespoon of cornstarch
- 1 1/2 cups of club soda or seltzer water
- salt to taste
For the Sushi Filling
- Cooked Chicken, sliced or shredded
- asparagus
- crab
- cream cheese
- sliced veggies
- avocado
- (the possibilities are endless)
- Oil for frying
Instructions
- Start with your Nori Sheet. Lay it out onto your sushi roller. Be sure to wrap your sushi roller in plastic wrap. This will keep the roll or your sushi rice from sticking to it.
- Take your hands and run them under warm water. This will keep the rice from sticking to your hands. Then place 1/2 cup of the rice on the Nori Sheet and spread it all around.
- Once you get your rice all over the nori sheet, then take your inside food (for me, this is the cream cheese, chicken and asparagus) and place them on one end of the nori sheet.
- Then from this point, you just roll it up as tight as you can get it.
- Once you get it rolled, remove the roller and you will have to make sure you roll it all the way back up again (that is normal if it doesn't hold the first time. You are just trying to mold it together. )
- Take your roller and squeeze the sushi roll to make sure it is tight and holding together.
- Now - from this point, you can slice them and eat using the drizzle of the eel sauce, but my daughter and I love the tempura rolls they serve at our favorite Thai restaurant, so that is what we made. That crunchy outer texture adds the most amazing flavor.
- Make Your tempura batter.
- Preheat a skillet on medium-high on the oven with about 1 1/2" of vegetable or canola oil in the bottom. Once it has reached the right temperature (350 degrees for frying), It's time to fry!
- Dip your sushi rolls (don't cut them yet) in the tempura batter and place right into the hot oil for a quick fry.
- Once one side is slightly browned, roll it over so that each side gets brown. Once all sides are browned, remove from oil onto a paper towel-lined plate and finish cooking your rolls.
- Get a glass of warm water and dip your knife into the water before slicing your rolls. This keeps your rice from sticking to the knife and will stay in the sushi roll.
- Now -- serve with your delicious homemade eel sauce and enjoy your very own homemade sushi dinner.
Nutrition Information:
Yield:
10Serving Size:
1Amount Per Serving: Calories: 138Total Fat: 7gSaturated Fat: 1gTrans Fat: 0gUnsaturated Fat: 5gCholesterol: 22mgSodium: 128mgCarbohydrates: 13gFiber: 2gSugar: 1gProtein: 6g
Jamie
Thursday 12th of May 2022
For the tempera.. is there any other flour I can use that is gluten free
Jennifer Sikora
Tuesday 17th of May 2022
I am sure you can use rice flour or something along that lines.
Weekend Reading - What Inspired Me This Week - Jen's Journey
Saturday 14th of March 2015
[…] in the kitchen this week. If you missed my posts about making your own sushi, you can find them here, here, and here. We also made a really yummy mango avocado salsa that goes great on tacos or just […]